Published
- 5 min read
A Homebaked Raspberry PI Cluster
Link Copied!
Share away.
Overview
Why
Back when I transitioned from backend to platform engineering (post) I wanted to get more hands-on experience with Kubernetes, without the hefty bills from services like EKS, which can cost around £80 monthly just for the control plane…
In addition, the little cluster case is cute as fuck!
Goal
Back when I started this project, I had grand ideas about self-hosting my blog’s backend and frontend, all from my own kit. Sounded brilliant in theory, but reality checked in pretty quickly. Forking out for a public IP was a hard no from the start. And the thought of wrestling with dynamic DNS? Nope, not for me.
But there was an even bigger deal-breaker: exposing my home IP was off the table. The last thing I needed was to make my home network a target.
That realization was a game-changer. It made me step back and see what this home cluster should really be about. It wasn’t going to be the digital backbone of my online presence. Instead, it morphed into my own private sandbox, a place for me to tinker with Kubernetes without the financial sting, and to run internal services without fretting over their ability to scale or exposing them to security risks. It’s all about learning and experimenting in my own safe haven, away from the prying eyes and potential threats of the wider internet.
Note: I’ve still got a trick up my sleeve for making internal services accessible to the outside world when I want to. Cloudflare Tunnels come into play here, letting me safely expose what I need without the security headaches of a direct exposure. It’s the best of both worlds, really.
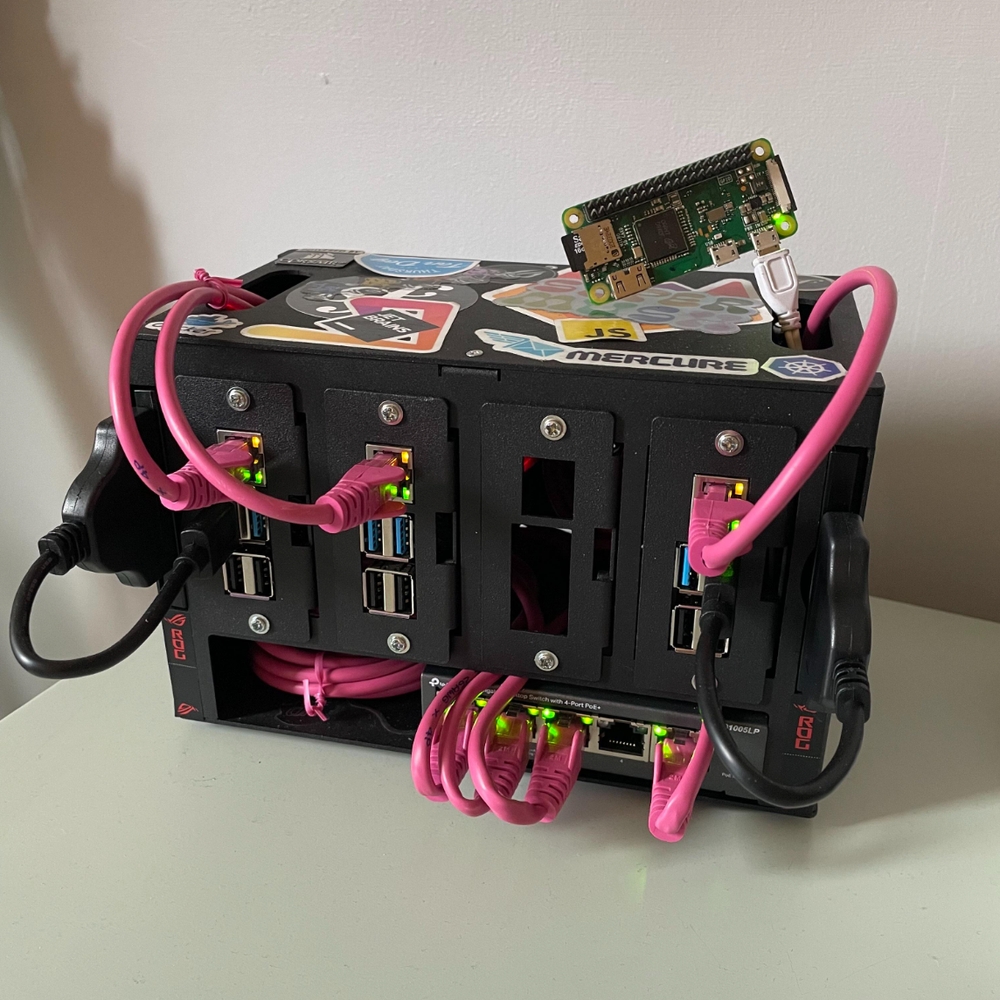
The Hardware
My cluster currently consists of
- x3 Raspberry PI4 4GB @ £45.83
- x3 Raspberry Pi PoE+ HAT @ £19.17
- x1 Raspberry Pi Zero W @ £12.50
- x1 5-Port PoE Network Switch @ £36.98
- x5 RJ45 Cat5e @ £1.25
- x1 Cluster case @ £52.07
- x2 240GB SSD @ £30.00
- x2 SSD to USB 3.0 @ £5
Totaling in at £372.80, a small investment for long-term hosting!
The Environment
Each node in the cluster is flashed with Debian, courtesy of RPIimager, a nifty little tool that can flash multiple storage cards with some pre-configured config like user and network credentials.

Once the nodes were online, I installed Kubernetes, choosing k3s for its simplicity and ARM64 support.
As a future improvement, I will have to move the operating system from SD cards over to SSDs. This upgrade is crucial for running k3s, considering its intensive read-write activities that strain the limited write cycles of SD cards, leading to faster wear and potential failure.
SSDs, offering higher durability and performance, can better support the heavy I/O workloads of Kubernetes, ensuring a more stable and efficient environment. This transition is important to avoid future outages!
Network
Design
This design took a little back and forth.
- Reserved IPs: Required for MetalLB so it can manage & distribute them to Kubernetes services.
- Separate Networks: Required to keep the cluster services away from the everyday traffic of our household devices.

Adblocking
With the above networking in place, I deployed the helm chart MoJo2600/pihole-kubernetes and set the IP to my primary router’s DNS value.


Monitoring
After stumbling upon carlosedp/cluster-monitoring, a few kubectl commands were all it took to get both node and network monitoring support right out of the box.
Nodes

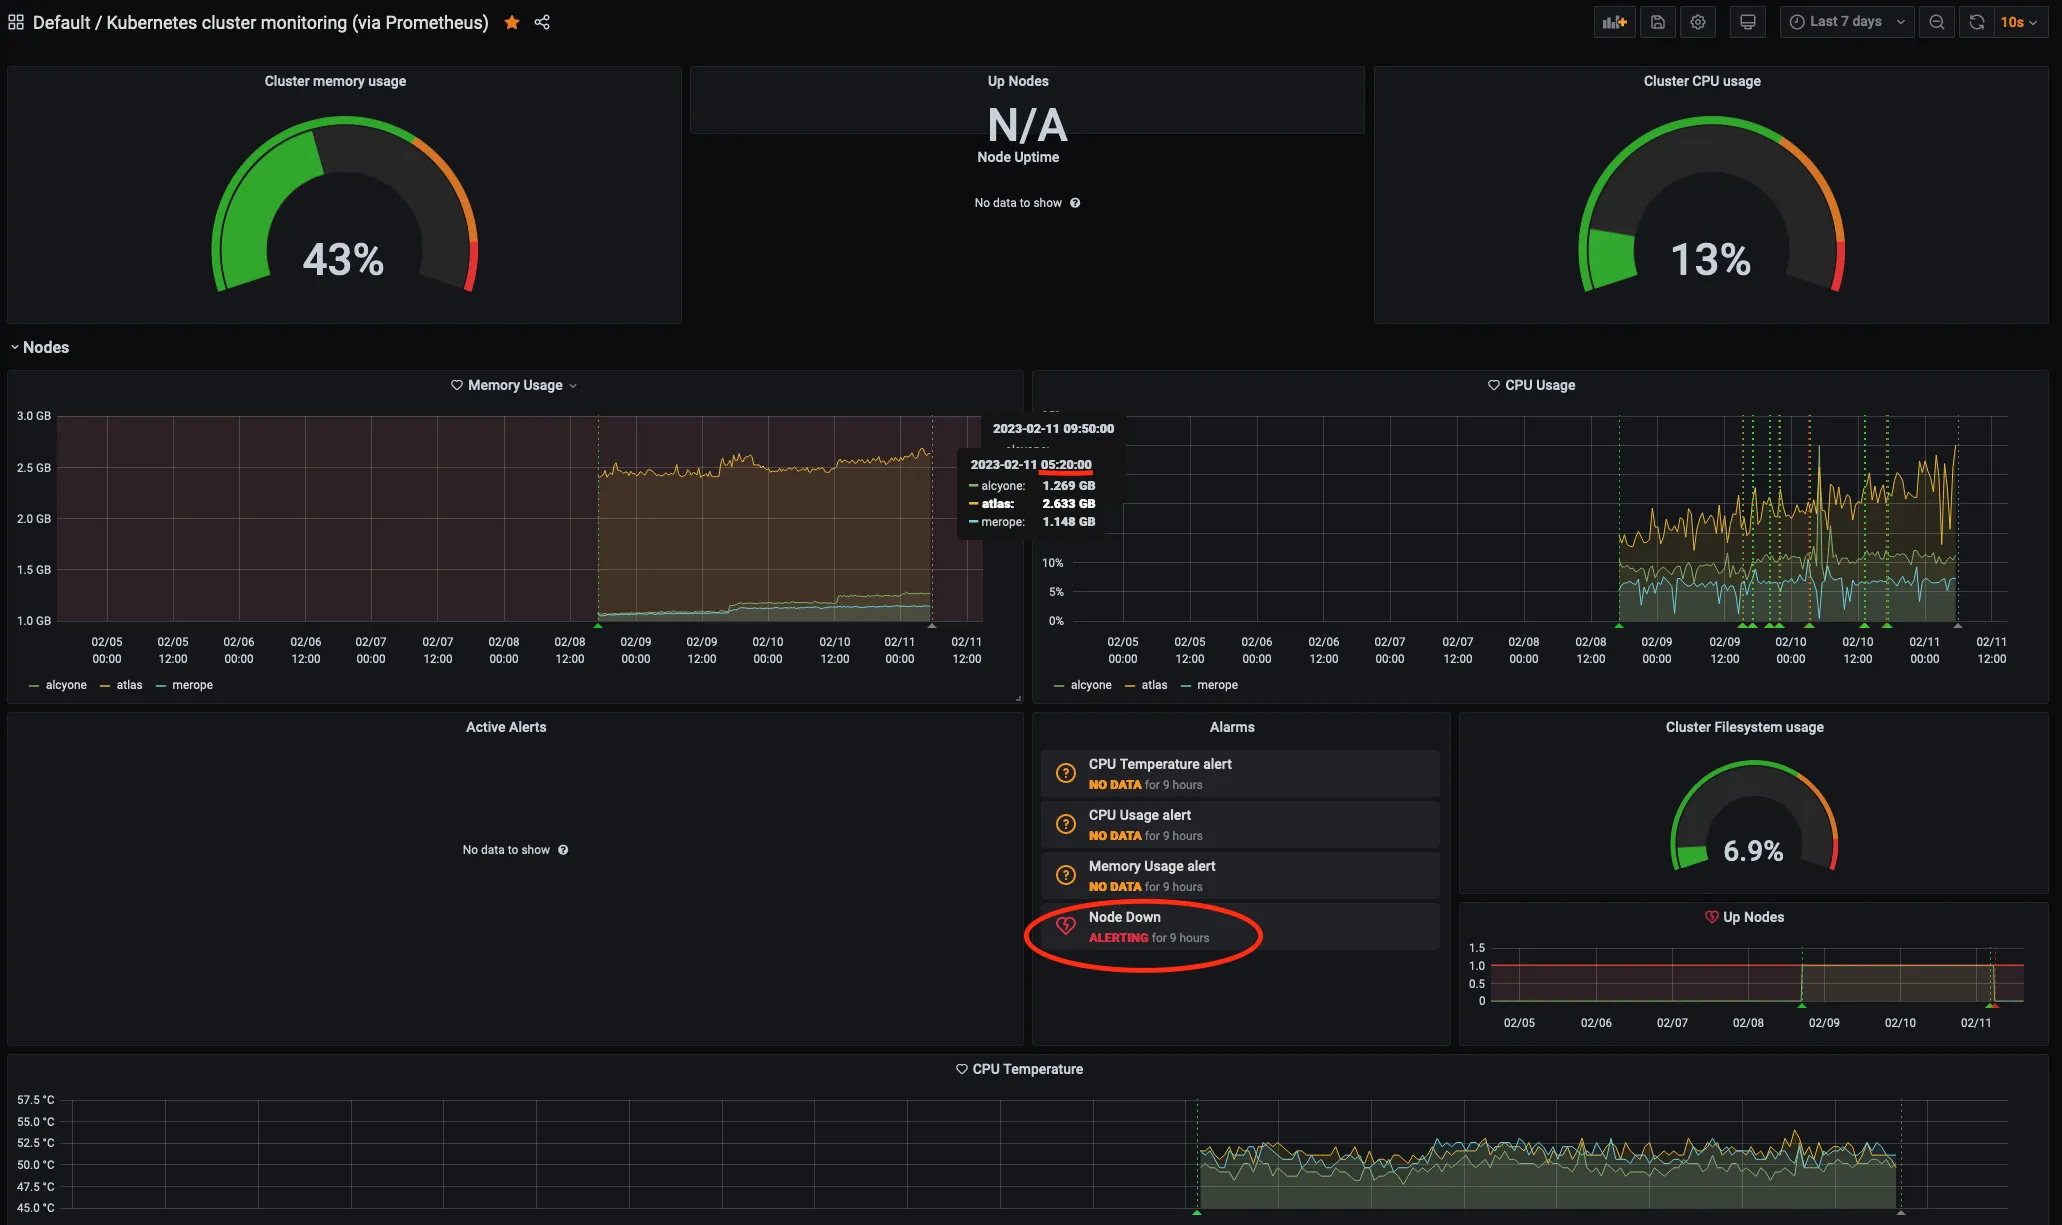
Network

Storage
On the storage front, I’ve gone with Longhorn.io to keep things running smoothly. It’s open-source and does a solid job managing the pair of SSDs in my setup.
What I like about Longhorn is how it takes the complexity out of dealing with storage, making sure my data is replicated, snapping backups, or getting things back online after a hiccup.

Remote Access
So for example, when I’m out grabbing a pint I can’t help but want to check in on my cluster back home. That’s where a good ol’ VPN comes into play.
Why Tailscale, you ask? cause It’s dead simple. Didn’t take more than a few minutes to get the agents up and running on my nodes. Now, no matter where I am, I can sneak a peek at my setup without a worry. Quality.
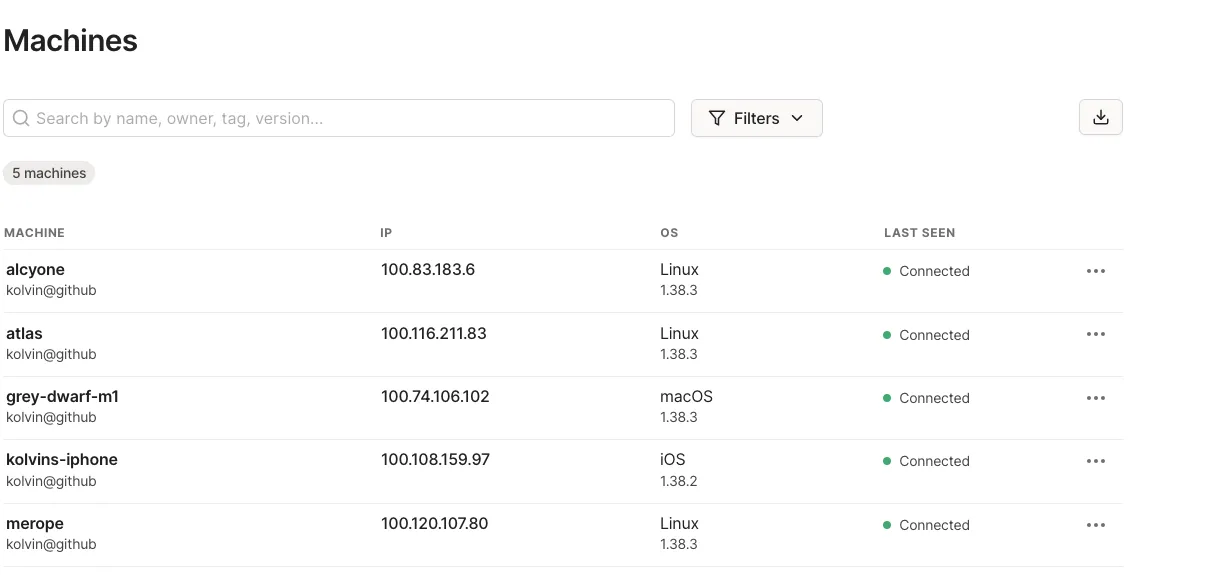
In addition to this, a small update to my .kubeconfig control-plane IP enabled remote kubectl commands.
Conclusion
Well, here we are then. Honestly, calling this project “never-ending” might be understating it. It’s been more of a second job at times, minus the paycheck. But, you know what? I’m perfectly fine with that.
The journey has been filled with moments of frustration interspersed with those little victories where everything just clicks, and I’ve discovered a profound joy in the tinkering. It’s this continuous cycle of building, breaking, and fixing that’s become addictively satisfying.
It’s a bit like mucking around in a sandbox. Except this sandbox lets me play with tech instead of sand. Despite the occasional headache or the way it devours time, I still find myself drawn back to it, time and time again.
Expect some future posts, probably delving into more technical specifics. This high-level recap simply skims the surface of the past year and a half…yes, it took that long, largely because I kicked things off just as the shortage and price gouging hit. But every minute, every penny spent, and every problem solved has been worth it.
It’s been a labor of love x